Apify is the largest marketplace of tools for web scraping, automation, and data for AI.
Overview
Apify brings structured web data from 20,000+ ready-made web tools into Dify workflows. Instead of writing custom crawlers or parsing raw HTML, pick a purpose-built Actor for Google Maps, LinkedIn, Amazon, news sites, or any other web source and get clean, structured results ready for LLM processing.
Generic web crawlers return basic markdown. Apify returns structured JSON: business names, ratings, prices, reviews, contact details - whatever the use case demands. That data flows directly into Dify workflows, chatflows, and AI agents.
Why Apify
Most web data tools do one thing: crawl pages and return raw text. That works for simple use cases, but AI workflows need more.
Structured data from any platform: Apify Actors extract specific data points from specific platforms. A Google Maps Actor returns business names, addresses, ratings, and review counts as structured JSON. An Amazon Actor returns product titles, prices, and seller information. No parsing, no guesswork.
20,000+ community-built tools: Apify Store hosts thousands of ready-made scrapers and automation tools built by a global developer community. If a platform exists, there's likely an Actor for it.
Sync or async execution: Run Actors synchronously (wait for results) or asynchronously (start and continue). Long-running scrapes can trigger Dify workflows via webhook when they finish.
Production-grade infrastructure: Apify handles proxies, browser fingerprinting, rate limiting, and retries. Scraping at scale without getting blocked is built in.
What you can build
RAG knowledge base enrichment
Keep AI chatbots grounded in fresh, accurate web data. Use Apify's Website Content Crawler to scrape documentation, competitor sites, or industry resources. Then feed that structured content into Dify's Knowledge Base. The result: a chatbot that answers questions with current, real-world information instead of stale training data.
Example: Collect competitor pricing pages weekly → ingest into Dify Knowledge Base → build a competitive analysis chatbot that answers "What does Competitor X charge for their enterprise plan?" with live data.
Automated research and monitoring agents
Build AI agents that automatically gather and analyze web data on a schedule. Track competitor moves, monitor news mentions, and aggregate industry trends - all processed through Dify's LLM workflows.
Example: Schedule Google Search Scraper for "[competitor name] product launch" → Dify workflow summarizes findings with an LLM → pushes a digest to Slack or email every morning.
Lead generation and enrichment
Turn location, industry, or keyword searches into qualified lead lists. Apify Actors extract business data from Google Maps, company websites, and directories. Dify workflows then enrich, score, and format that data for CRM import.
Example: Input "digital marketing agencies in Berlin" → Google Maps Scraper extracts 200 businesses with contact info → Dify workflow scores and ranks by rating and review count → outputs a formatted lead list.
E-commerce price and review monitoring
Track product prices, availability, and customer sentiment across marketplaces. Apify Actors scrape Amazon, Shopify stores, eBay, and more. Dify workflows analyze changes and trigger alerts.
Example: Amazon Product Scraper runs daily on 50 competitor products → Dify workflow compares prices to yesterday → sends an alert when a price drops more than 10%.
Features
The Apify plugin provides six tools and one trigger for Dify workflows:
Run Actor
Start any Actor with a custom JSON input. Choose synchronous execution (wait for results within the workflow) or asynchronous execution (start the Actor and continue). Use this for any scraping, crawling, or data extraction task.
Run task
Execute preconfigured Actor tasks with predefined inputs, schedules, and settings. Ideal for recurring workflows where the same Actor runs with the same parameters.
Scrape a single URL
Quickly extract content from a single web page without configuring a full crawl. Perfect for on-the-fly data retrieval inside chatflows and agents.
Get dataset items
Retrieve structured results stored in an Apify dataset. Combine this with Run Actor to first execute a scraper, then pull the results into the next workflow step.
Get key-value store record
Fetch files, screenshots, or data records from Apify's key-value storage. Useful for retrieving exported files, cached results, or any data stored during Actor runs.
Actor run finished trigger
Automatically trigger a Dify workflow or chatflow when an Apify Actor completes. Connect this via webhook so long-running scrapes kick off downstream processing the moment results are ready without polling.
Getting started
Prerequisites
- An Apify account (free tier available)
- A Dify account (self-hosted or cloud)
Installation
- In Dify, go to Plugins from the top menu.
- Select Install plugin → Marketplace.
- Find apify-integration and install it.
- Return to the Plugins page to configure it.
Authentication
Connect with an API key or OAuth:
API key:
- Open the plugin and select Add API key.
- Paste the Apify API token from Apify Console → Integrations.
- Select Save. A green indicator confirms the connection.
OAuth:
- Open the plugin and select Add OAuth.
- Follow the authorization flow.
- Select Save.
Usage example: scraping Google Maps data in a workflow
This example shows how to extract restaurant data from Google Maps using Apify's Google Maps Scraper Actor inside a Dify workflow.
Step 1: Create a new workflow
- Open the Dify project and create a new Workflow from blank.
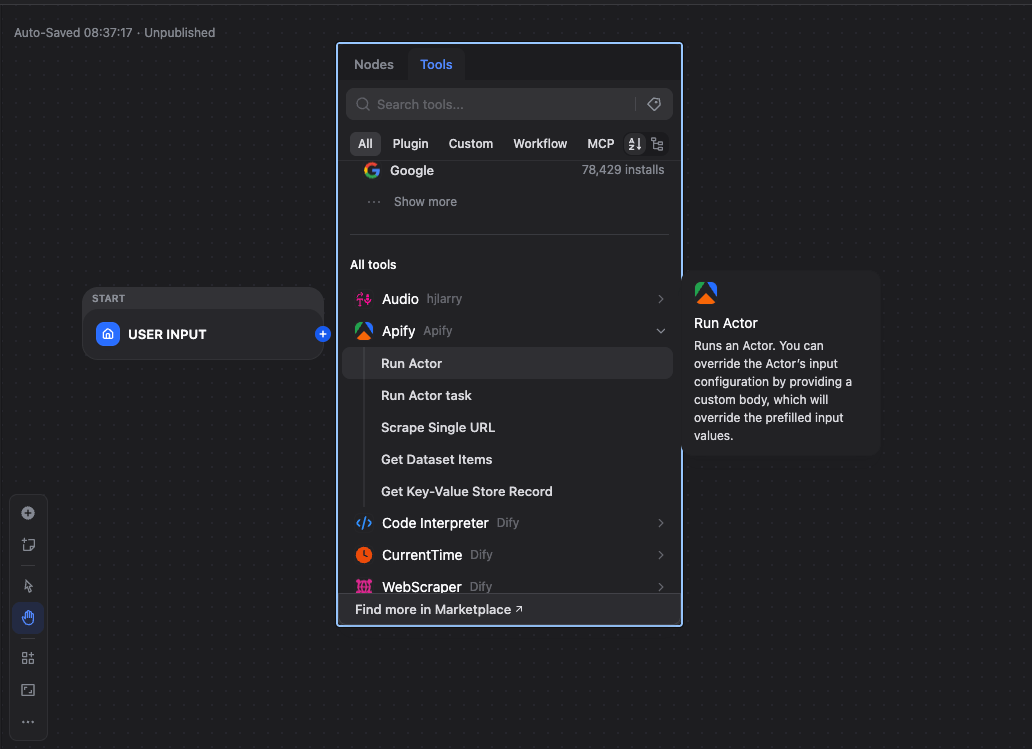
- Click + → Tools → Apify → Run Actor.
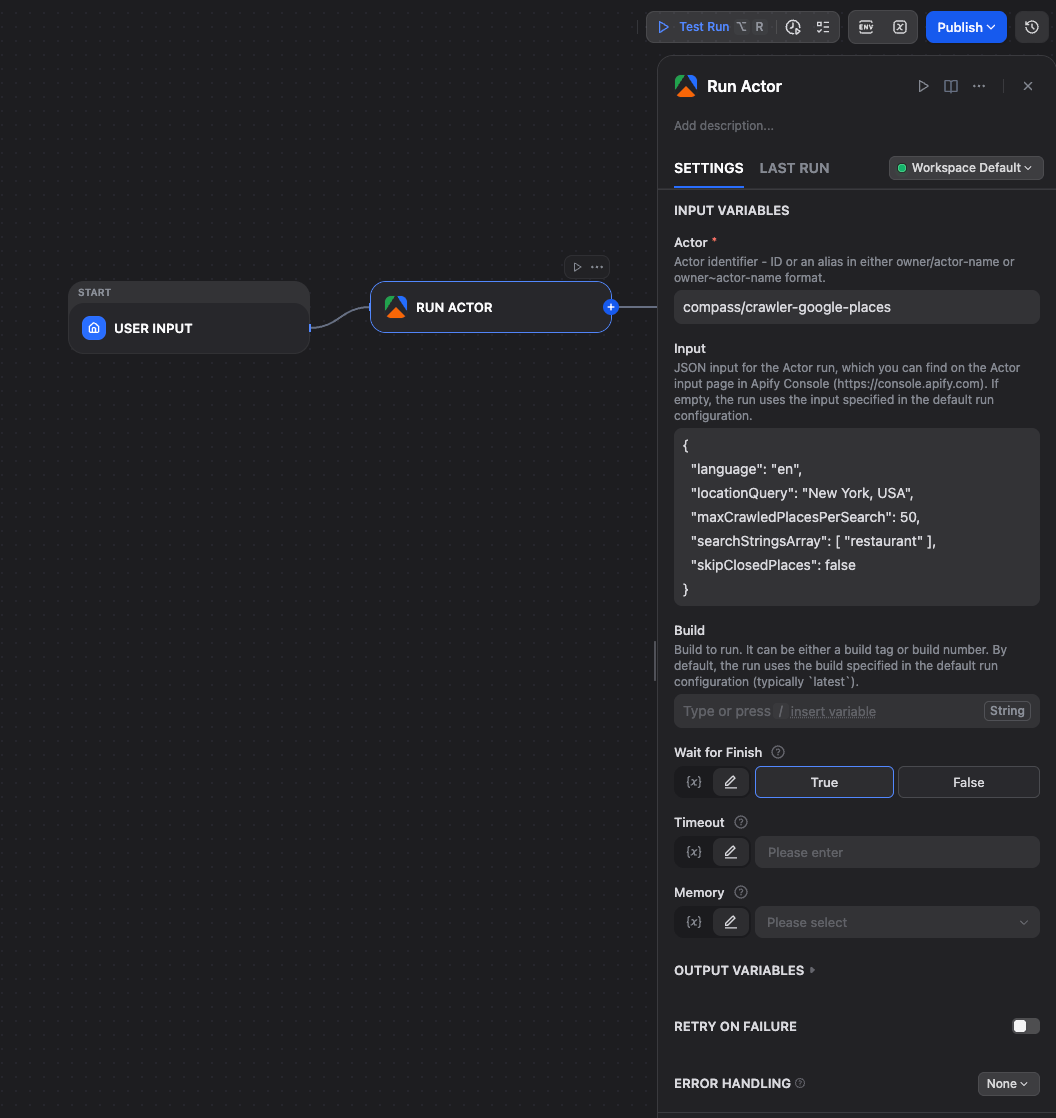
Step 2: Configure the Run Actor node
- Set Actor ID to .
- Set Input to JSON object:
- Set Wait for Finish to to return immediately after starting the run, or to wait until the run reaches a terminal state (e.g. SUCCEEDED, FAILED).
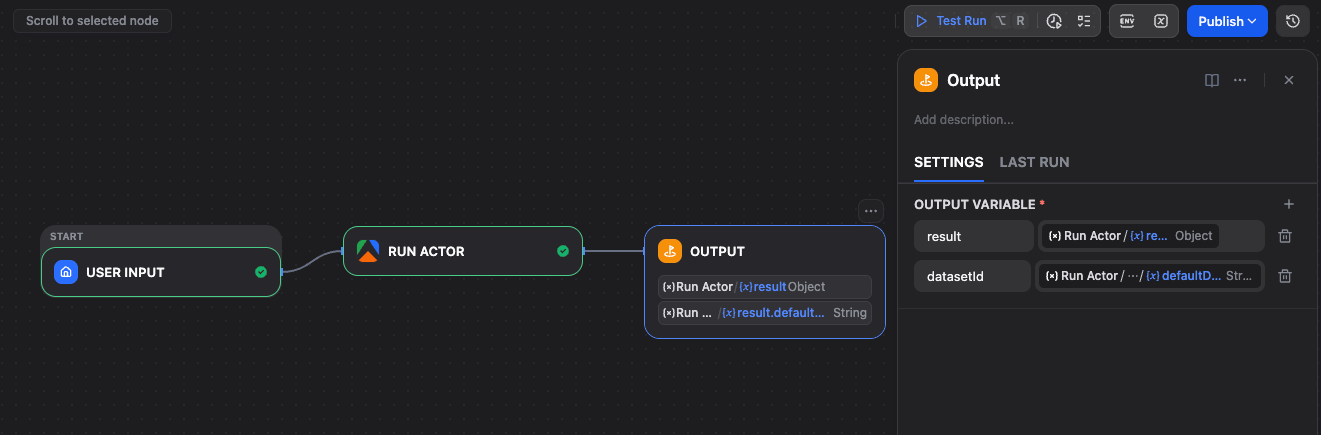
Step 3: Connect and configure the output
- Add an Output node and connect the Run Actor node to it.
- In the Output node, add a variable (e.g. ) and map it to the Run Actor response.
Step 4: Run
Click Run. Dify triggers the Apify Actor. Run details (including run ID) are returned immediately or after completion, depending on Wait for Finish.
You can inspect runs and results in Apify Console.
Using Apify as a trigger
Apify can automatically start Dify workflows when an Actor finishes, so it’s ideal for scheduled pipelines.
- In Plugins, open the Apify plugin → Endpoints section.
- Click +, choose the target Workflow or Chatflow app, name it, and save. Dify generates endpoint URLs.
- In Apify Console, open the Actor → Integrations → add an HTTP webhook with the Dify endpoint URL.
- Under Events, select Run succeeded and save.
Note: The Dify Workflow or Chatflow must be published for the webhook to work.
For detailed trigger setup, including chatflow configuration and accessing webhook payload data, see the Apify Dify integration guide.
Popular Actors to try with Dify
- Website Content Crawler - Extract clean text from any website for RAG pipelines
- Google Maps Scraper - Business data with ratings, reviews, and contact details
- Google Search Scraper - Search results for research and monitoring workflows
- Amazon Product Scraper - Product data, prices, and reviews
- Instagram Scraper - Posts, profiles, and hashtag data
- Twitter Scraper - Tweets, profiles, and trends
Browse 20,000+ Actors on Apify Store.